Gluten-Free Vegan Sourdough Artisan Bread (Rustic Style)
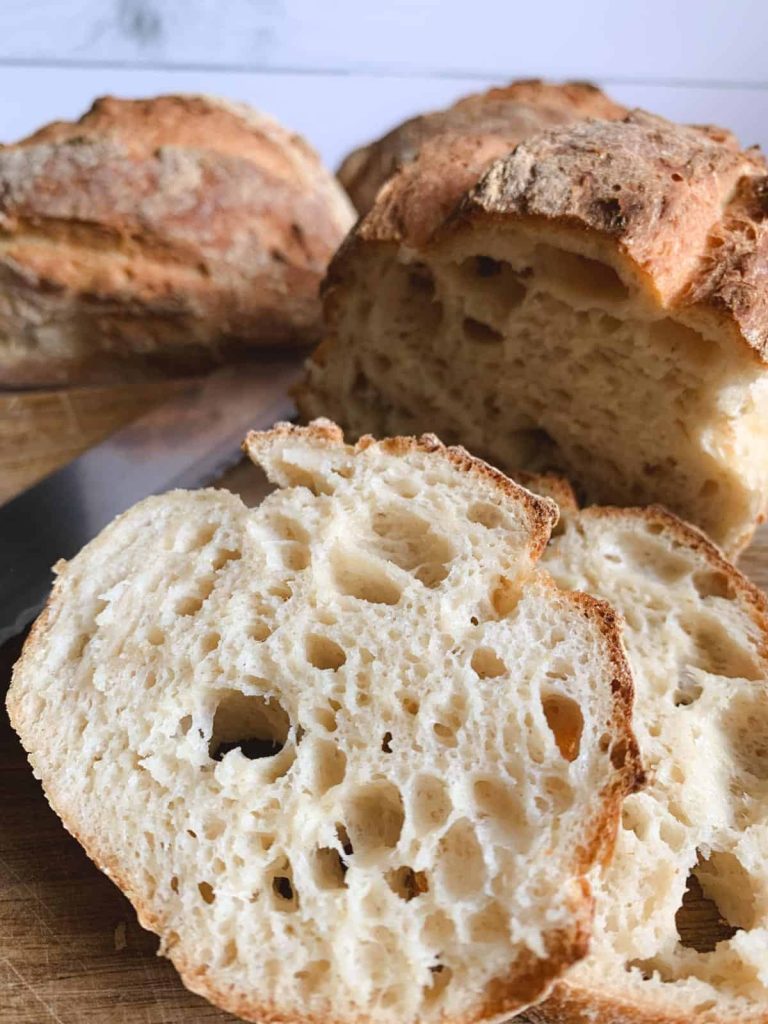
This gluten-free vegan sourdough artisan bread has a beautifully rustic appearance and a bold, complex flavor that is truly unforgettable. Made with a unique blend of quinoa flour and certified gluten-free oats, this bread has an earthy, nutty taste similar to pine nuts, balanced with a deep sourness reminiscent of aged parmesan cheese.
This recipe is one of my proudest kitchen creations. I bake it almost every day, and it has become a best-seller in my cottage bakery, consistently earning glowing reviews. It’s hearty, flavorful, and incredibly satisfying — the kind of bread you keep thinking about long after the last slice is gone.
Best of all, this recipe is:
- 100% gluten-free
- Completely vegan
- Free of psyllium husks
- No Dutch oven required
Why You’ll Love This Bread
- Naturally fermented for rich sourdough flavor
- Rustic, artisan look (imperfections welcome!)
- Crispy crust with a soft, airy crumb
- Perfect for dinner, breakfast, or toasting
- Ideal with vegan butter, soups, stews, or coffee
This is not a “special occasion” bread — this is an everyday obsession.
Important Notes Before You Start
This recipe is intentionally made without psyllium husks, which improves flavor and makes it suitable for people sensitive to psyllium. However, this also means the dough is very soft and sticky, and not easy to shape like traditional bread dough.
👉 If neat shaping and decorative scoring are important to you, this recipe may not be ideal. The rustic look is part of its charm.
👉 A psyllium-based version is in development, and gluten-free sourdough baguettes are also a great alternative if you want easier shaping.
Ingredients
Levain (Fed Starter)
- 110 g gluten-free sourdough starter (brown rice starter recommended)
- 110 g brown rice flour or sorghum flour
- 110 g water
Dough
- 100 g potato starch
- 80 g quinoa flour
- 100 g certified gluten-free oat flour
- 20 g sweet white rice flour (glutinous/sticky rice flour)
- 13 g xanthan gum
- 9 g pectin
- 15 g salt
- 288 g water
For Shaping
- 2 tablespoons gluten-free flour (use sparingly)
Equipment Needed
- Stand mixer with paddle attachment
- Kitchen scale (essential for gluten-free baking)
- Proofing bucket or container with lid
- Baguette pan (recommended) or DIY foil tray
- Sharp knife or bread lame
- Baking tray for steam
- Digital thermometer (optional but helpful)
Step-by-Step Instructions
1. Make the Levain
- In a bowl, mix the starter, brown rice flour, and water.
- Transfer to a clean glass jar.
- Cover loosely with a cloth or tea towel.
- Place in a warm spot and let rise 8–10 hours, until doubled in size.
💡 Tip: If your home is cold, briefly warm the oven for 2 minutes, turn it off, and place the jar inside.
2. Mix the Dough
- Add all dry dough ingredients to the bowl of a stand mixer.
- Add the prepared levain.
- Start mixing, then slowly add the water.
- Mix on medium speed for 3 minutes.
✔ The dough will look like thick, sticky batter — this is correct.
3. Cold Fermentation
- Transfer the dough into a proofing bucket.
- Cover tightly.
- Refrigerate for 12–18 hours.
This slow fermentation develops flavor and structure.
4. Shape the Loaves
- Lightly flour a gluten-free work surface.
- Divide dough into 4 equal portions.
- Using floured hands, gently shape into rough 5-inch loaves.
- Place onto a baguette pan or prepared tray.
⚠️ The dough is fragile — do not overwork it.
5. Proof the Bread
- Cover loaves with lightly oiled plastic wrap.
- Place in a warm environment.
- Proof for 90 minutes to 3 hours, until puffed about 75%.
⏱ Longer proof = more sour flavor.
6. Preheat & Steam
- Remove bread from oven if proofing there.
- Preheat oven to 425°F (218°C).
- Place a heat-safe dish filled with ice and water on the bottom rack to create steam.
7. Score & Bake
- Dip your blade in water.
- Gently score the loaves.
- Bake at 425°F for 25 minutes.
- Reduce temperature to 400°F (204°C).
- Bake another 10–20 minutes, until deep golden.
✔ Bread is done when internal temperature reaches 210°F (99°C).
8. Cool Completely
Let bread cool on a rack for at least 2 hours before slicing.
This prevents gumminess and improves texture.
Storage
- Store at room temperature for up to 3 days
- Best toasted after day 2
- Freeze for up to 2 months, tightly wrapped
Substitutions & Variations
- Oat-free: Replace with teff or cassava flour
- Potato-free: Use tapioca, arrowroot, or cornstarch
- Milder flavor: Replace some quinoa flour with cassava
- Higher protein: Replace part of the water with egg whites (by weight)
Final Tip
Because this dough contains no psyllium husks, always score quickly with a wet blade and embrace the rustic look — that’s where the magic is ✨
