When rhubarb is in season, I always look for simple desserts that really let its fresh flavor shine. One recipe I make every year is these Rhubarb Dream Bars. They have a buttery shortbread-style crust topped with a soft, creamy rhubarb filling that bakes into perfectly sliceable dessert squares. Every bite has a wonderful balance of sweetness and tartness, making these bars ideal for spring and summer gatherings.
The first time I baked these bars, I was surprised by how easy they were to prepare. There is nothing complicated about the recipe. The crust comes together in just a few minutes, and while it is baking, the filling can be mixed in one bowl. Once everything is layered together, the oven does most of the work.
These bars are one of those desserts that look impressive on the table without requiring special baking skills. Whether I serve them after dinner, pack them for a picnic, or bring them to a family gathering, they disappear quickly.
Why I Love Making Rhubarb Dream Bars
There are plenty of desserts made with berries, apples, or peaches, but rhubarb has its own unique flavor that makes every recipe memorable. Its natural tartness creates a refreshing contrast to the sweet filling.
Unlike many rich desserts, these bars feel light enough to enjoy with an afternoon cup of tea or coffee while still satisfying a sweet craving.
Another reason I keep making them is that the ingredient list is short. Most of the ingredients are already in my kitchen, so whenever I have fresh or frozen rhubarb available, I can prepare this dessert without making an extra trip to the grocery store.
What Makes These Bars Special?
Several things make these Rhubarb Dream Bars stand out from ordinary dessert squares.
A Tender Buttery Crust
The bottom layer is soft, buttery, and lightly sweet. It provides enough structure to hold the filling while remaining delicate enough to melt in your mouth.
Creamy Filling
The filling bakes into a smooth, custard-like layer that wraps around every piece of rhubarb. Instead of becoming overly dense, it stays soft and silky after cooling.
Fresh Rhubarb Flavor
Rhubarb keeps its bright flavor during baking. The natural tartness balances the sugar beautifully, preventing the dessert from becoming overly sweet.
Beautiful Color
Depending on the rhubarb used, the filling develops lovely pink shades that make the finished bars look as good as they taste.
Ingredients You’ll Need
One thing I appreciate about this recipe is how simple the ingredients are. There are no specialty baking products required.
For the Crust
The crust uses only three basic ingredients.
All-Purpose Flour
Regular all-purpose flour provides structure while keeping the crust tender.
Granulated Sugar
White sugar adds just enough sweetness without overpowering the filling.
Butter
Room-temperature butter mixes easily into the flour and sugar, creating a soft dough that presses evenly into the baking pan. Salted butter gives the crust a slightly richer flavor.
For the Filling
The filling comes together in only a few minutes.
Large Eggs
Eggs create the creamy texture that holds everything together.
Granulated Sugar
White sugar balances rhubarb’s natural tartness without masking its flavor.
All-Purpose Flour
A small amount of flour thickens the filling as it bakes.
Salt
Even a small amount of salt enhances both the sweetness and the fruit flavor.
Rhubarb
Fresh diced rhubarb is wonderful when it is in season, but frozen rhubarb also works very well. There’s no need to limit this dessert to only a few weeks each year.
Preparing the Pan
Before mixing anything together, I always prepare the baking pan.
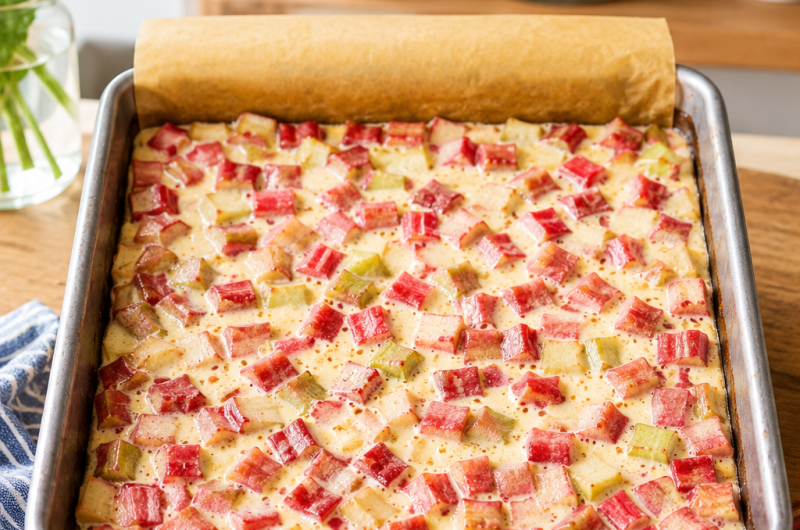
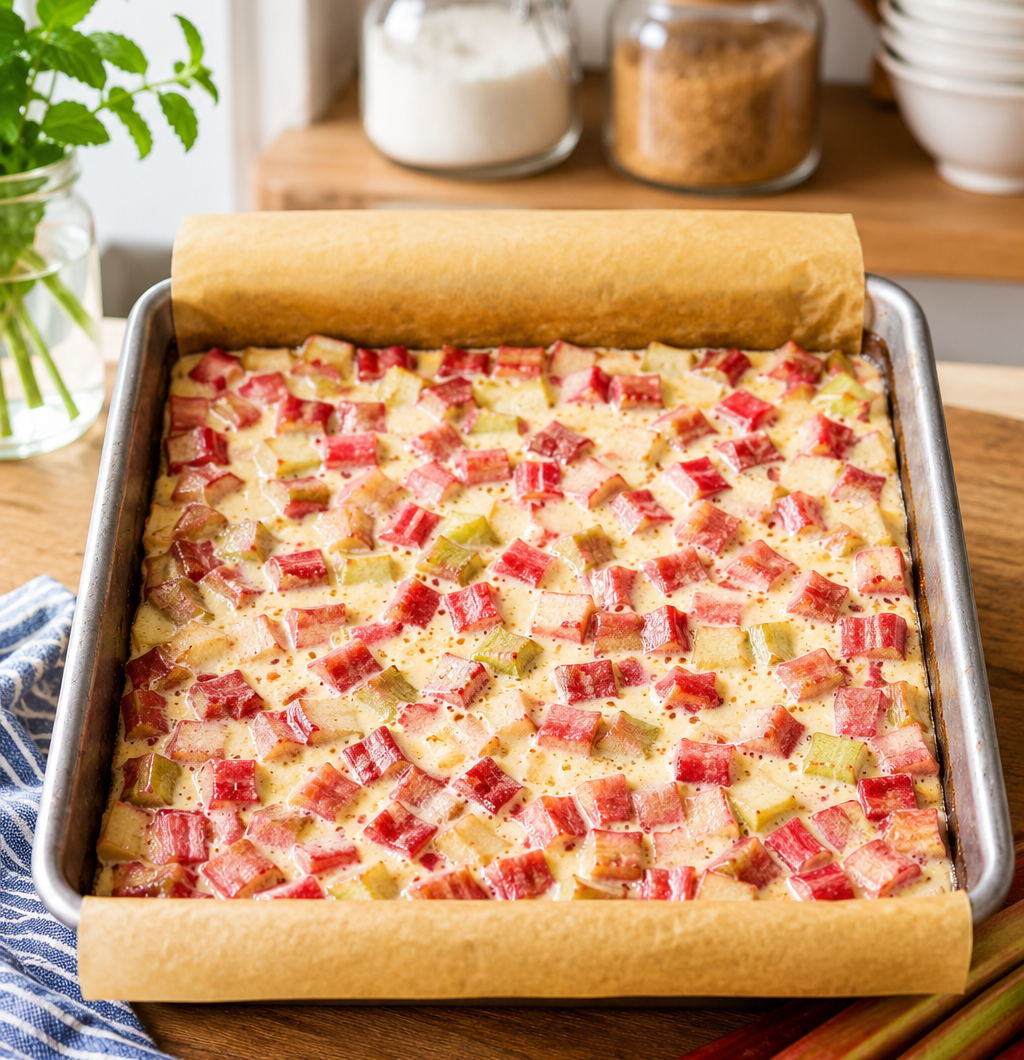
I line an 8×8-inch baking pan with parchment paper, leaving extra paper hanging over the sides. This simple step makes removing the bars incredibly easy once they have cooled.
Instead of trying to loosen each square with a knife, I simply lift the entire dessert out of the pan before slicing.
It also makes cleanup much easier.
Making the Buttery Crust
The crust is probably the easiest part of the recipe.
I place the flour, sugar, and softened butter into a food processor and blend until everything resembles soft crumbs.
The mixture should hold together when pressed between your fingers.
Next, I transfer it into the prepared pan and gently press it into an even layer.
There’s no need to roll the dough. Using clean hands or the bottom of a measuring cup works perfectly.
Once evenly spread, the crust goes into a preheated 350°F oven for about 15 minutes.
Don’t expect much color at this stage. The crust should remain fairly pale while becoming lightly set.
Mixing the Rhubarb Filling
While the crust bakes, I prepare the filling.
Eggs, sugar, flour, and salt are whisked together until smooth. I avoid overmixing because the goal is simply to combine everything evenly.
Once the mixture becomes smooth, I fold in the diced rhubarb until every piece is coated.
The filling stays fairly thin before baking, but it thickens beautifully in the oven.
Layering Everything Together
- As soon as the crust comes out of the oven, I pour the rhubarb mixture directly over the warm base.
- Using a spoon or spatula, I spread the filling evenly so every slice will have plenty of rhubarb.
- The warm crust begins setting the filling immediately, helping the layers bake together perfectly.
- The pan then returns to the oven for another 40 to 45 minutes.
- During baking, the filling slowly transforms into a soft custard while the rhubarb becomes tender without losing its pleasant texture.
- The edges should appear set, while the center has only the slightest movement when gently shaken.
- Once baked, I let the bars cool completely before attempting to cut them. This waiting time is important because the filling continues to firm up as it cools, producing clean, beautiful squares instead of messy slices.
- The result is a homemade dessert with a buttery crust, creamy filling, and bright rhubarb flavor that’s perfect for sharing throughout spring and summer.
Homemade Rhubarb Dream Bars
These homemade Rhubarb Dream Bars feature a buttery shortbread-style crust topped with a smooth, creamy rhubarb filling that bakes into soft, delicious dessert squares. The combination of sweet filling and naturally tart rhubarb creates a refreshing spring and summer treat that’s perfect for family gatherings, picnics, potlucks, or an everyday homemade dessert.
16
servings20
minutes45
minutes300
kcal1
hour5
minutesIngredients
- For the Crust
1 cup all-purpose flour
½ cup granulated sugar
½ cup butter, softened to room temperature
- For the Filling
2 large eggs
1 cup granulated sugar
¼ cup all-purpose flour
¼ teaspoon salt
2 cups diced rhubarb (fresh or frozen)
Directions
- Preheat your oven to 350°F (175°C). Line an 8×8-inch baking pan with parchment paper, allowing the paper to hang over two sides for easy removal after baking.
- Add the flour, sugar, and softened butter to a food processor. Blend until the mixture forms soft crumbs that hold together when pressed.
Transfer the mixture into the prepared pan and press it evenly over the bottom to create a smooth crust layer. - Place the pan in the preheated oven and bake for 15 minutes. The crust should be lightly set but still pale in color.
- While the crust bakes, whisk together the eggs, sugar, flour, and salt in a medium mixing bowl until smooth and fully combined.
Fold the diced rhubarb into the mixture until evenly coated. - Remove the partially baked crust from the oven.
Immediately pour the rhubarb filling over the warm crust and spread it evenly with a spatula. - Return the pan to the oven and bake for 40–45 minutes, or until the filling is set around the edges and the center no longer appears runny.
- Allow the bars to cool completely in the pan.
Using the parchment paper, carefully lift the bars from the pan and transfer them to a cutting board. Slice into even squares before serving.
If desired, lightly dust the tops with powdered sugar just before serving.
Notes
- Fresh and frozen rhubarb both work well in this recipe.
- If using frozen rhubarb, thaw and drain any excess liquid before adding it to the filling.
- Softened butter helps create a smooth, evenly pressed crust.
- Avoid over-whisking the filling once the ingredients are combined.
- The crust should remain light in color after its first bake.
- Allow the dessert to cool completely before cutting for clean, neat squares.
- Store leftover bars in an airtight container in the refrigerator.
- These bars are best enjoyed within a few days for the freshest texture and flavor.
- Freezing the finished bars is not recommended, as the filling may become soft after thawing.
Nutrition Facts
- Serving Size: 1 g
- Total number of serves: 16
- Calories: 171kcal
- Fat: 6g
- Saturated Fat: 4g
- Polyunsaturated Fat: 2g
- Cholesterol: 39mg
- Carbohydrates: 27g
- Protein: 2g