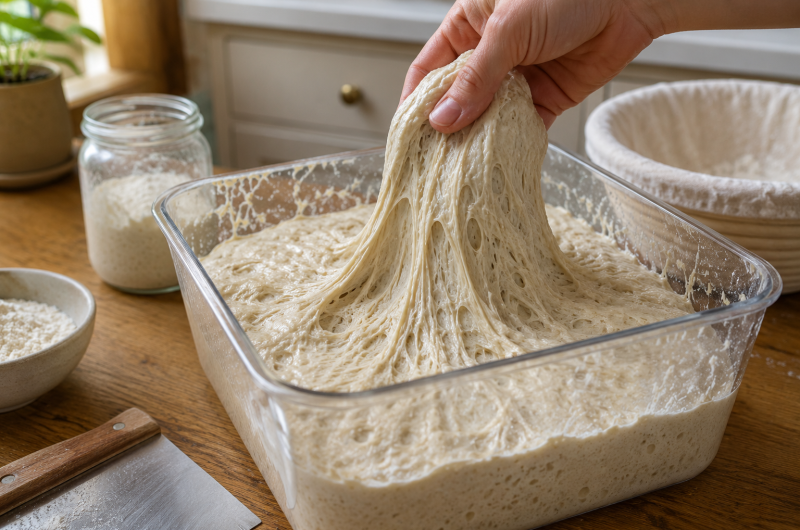
High-hydration sourdough bread is known for its thin, crisp crust and light, open crumb filled with irregular holes. This artisan-style loaf is made with bread flour, whole wheat flour, water, salt, and an active sourdough levain. The dough contains a generous amount of water, making it soft and sticky, but careful folding and fermentation gradually transform it into strong, elastic dough capable of producing excellent oven spring.
This recipe makes two sourdough loaves weighing approximately 900 grams each. The process takes most of one day, followed by an overnight cold proof and baking the next morning. Although the schedule is long, much of the time is inactive. Each stage serves a specific purpose, from preparing the levain and hydrating the flour to developing gluten, building flavor, and creating the characteristic open sourdough crumb.
What Makes This a High-Hydration Dough?
Hydration describes the amount of water in bread dough compared with the amount of flour. A high-hydration sourdough recipe contains more water than a standard sandwich bread or basic sourdough loaf. The extra moisture makes the dough softer and more difficult to handle, but it can also create a lighter interior, a more open crumb, and a delicate, crisp crust when fermentation and shaping are properly controlled.
Because different flours absorb water differently, the reserved water should be added gradually. Stronger flour may accept the full quantity without losing structure, while another flour may produce excessively loose dough. The goal is not simply to use every gram of water. The goal is to create well-hydrated dough that remains elastic, holds fermentation gases, and gains strength through mixing and stretch-and-folds.
The Role of an Active Sourdough Starter
A healthy sourdough starter is essential because it supplies the natural yeast and beneficial bacteria needed to ferment the dough. Use a ripe starter that rises predictably after feeding and shows clear signs of activity. A weak or neglected starter can make fermentation extremely slow and may produce dense bread, limited oven spring, or dough that lacks enough strength by the end of bulk fermentation.
The starter is used to prepare a liquid levain with bread flour, whole wheat flour, and water. This separate build creates the exact amount of active culture needed for the main dough. Keeping the levain around 77–80°F, or 25–26°C, encourages steady fermentation. It should look expanded, aerated, and lively after approximately five hours, although its condition is more important than an exact finishing time.
Preparing the Liquid Levain
At approximately 9:00 a.m., combine the ripe sourdough starter, medium-protein bread flour, whole wheat flour, and water in a small container. Mix thoroughly until no dry flour remains. Cover the container without sealing it completely airtight, and place it in a warm location. The levain should ferment for approximately five hours before being incorporated into the final dough.
Fermentation speed depends on starter strength, flour, water temperature, and room temperature. A warm environment encourages faster activity, while a cool kitchen can extend the process. The levain should appear bubbly and expanded when ready. It may also have a slightly rounded surface and a pleasantly fermented aroma. If it still looks flat and inactive after five hours, allow it more time before mixing the dough.
Why Autolyse Improves Sourdough Bread
The autolyse begins at approximately 12:00 p.m., two hours before the final dough is mixed. During this stage, the bread flour and whole wheat flour are combined with most of the water. The mixture is then covered and left undisturbed. Salt and levain are not included yet, allowing the flour to absorb water and begin developing gluten naturally.
A two-hour autolyse can make high-hydration dough easier to manage. As the flour hydrates, the dough becomes more extensible and begins forming structure without intensive kneading. This improves its ability to stretch without tearing later in the process. Autolyse may also help create a softer crumb and make it easier to incorporate the levain, salt, and reserved water during final mixing.
The dough does not need to look perfectly smooth during the autolyse. Mix only until no dry flour remains, cover the bowl, and let time perform much of the work. Keep the mixture reasonably warm so it does not cool excessively before bulk fermentation. If the dough temperature becomes too low, the final fermentation schedule may take longer than the suggested four hours.
Mixing the Final Sourdough Dough
At approximately 2:00 p.m., add the ripe levain and fine sea salt to the autolysed flour mixture. Pinch, squeeze, and fold the dough until both ingredients are evenly distributed. The dough will initially feel slippery or separated, but it should become more cohesive as mixing continues. Work carefully without tearing it aggressively or attempting to force it into a firm consistency.
Add the remaining 95 grams of water in small portions rather than pouring it in all at once. Fold the dough between additions and allow each portion to become absorbed. If the dough becomes extremely loose or soupy, stop adding water. Flour performance varies, so holding back part of the reserved water is better than creating dough that cannot maintain its structure.
Continue folding the dough for approximately two to three minutes. Reach beneath one side, stretch it upward, and fold it across the center. Rotate the bowl and repeat. The dough does not need to be fully developed at this stage because further strength will be created during bulk fermentation. Transfer it to a clean container once it looks slightly smoother and more unified.
Managing Bulk Fermentation
Bulk fermentation begins immediately after mixing and takes approximately four hours at a dough temperature near 78°F, or 25°C. During this stage, natural yeast produces carbon dioxide, the dough develops flavor, and its internal structure becomes stronger. Temperature has a significant effect on this process, so use the four-hour schedule as a guide rather than an inflexible rule.
A cooler dough will ferment more slowly and may need additional time. A warmer dough may become ready sooner, especially when the levain is highly active. Keeping the container in a stable, comfortably warm place helps produce predictable results. Avoid placing it in direct heat because overheating can accelerate fermentation too much and weaken the dough before it is divided and shaped.
Building Strength with Stretch-and-Folds
This high-hydration sourdough receives six sets of stretch-and-folds during the first half of bulk fermentation. Complete the first three sets at 15-minute intervals, followed by three sets at 30-minute intervals. These folds organize and strengthen the gluten network without traditional kneading. The dough should become smoother, more elastic, and better able to hold its shape after each set.
To complete one set, lightly wet your hands and lift one side of the dough until you feel gentle resistance. Fold it over the center, rotate the container, and repeat around the dough. Four or five folds are usually sufficient for each set. Handle the dough firmly enough to build strength but gently enough to avoid unnecessary tearing.
The first few sets may feel challenging because the dough will be very slack and sticky. It may quickly spread across the container after being folded. This is normal for high-hydration bread dough. As the autolyse, fermentation, and folds continue working together, the dough should begin holding a rounded shape for longer and develop a smoother, more elastic surface.
After completing the sixth set, leave the dough undisturbed for the remainder of bulk fermentation. Repeated handling late in the process could release gas and disrupt the internal structure. This final resting period allows fermentation to continue while the dough becomes aerated. Its appearance and movement should noticeably change as it approaches the correct stage for dividing.
Recognizing the End of Bulk Fermentation
Properly fermented dough should look smoother, lighter, and more aerated than it did after mixing. Look for visible bubbles beneath the surface, slightly rounded edges, and an overall increase in volume. When the container is gently shaken, the dough should move as one soft, jiggly mass. It should appear active and alive rather than heavy, flat, or dense.
The dough does not necessarily need to double in size. Waiting for a full doubling could lead to overfermentation, especially in a warm kitchen. Judge readiness by combining several signs: increased volume, visible gas, stronger structure, smoother texture, and lively movement. If the dough still appears tight and inactive after four hours, give it additional fermentation time before dividing.
Overfermented dough may become excessively loose, sticky, and difficult to shape. It may spread quickly even after being preshaped and can produce limited oven spring. Underfermented dough, however, may feel dense and resist shaping, resulting in a tight crumb. Learning to recognize the correct fermentation stage is one of the most important skills in artisan sourdough baking.
Dividing and Preshaping the Dough
At approximately 6:15 p.m., lightly flour the work surface and gently release the dough from its container. Use a bench knife to minimize unnecessary handling and avoid aggressively pulling or deflating it. Divide the dough into two equal portions. A digital scale may be used if you want both finished sourdough loaves to have a similar size and baking time.
Use the bench knife to preshape each portion into a loose round. The purpose of preshaping is to organize the dough and create enough tension for easier final shaping. Avoid forcing the dough into an overly tight ball. Leave the rounds uncovered for approximately 30 minutes so the gluten can relax before the final boule or batard shaping.
During the bench rest, the rounds may spread slightly because this dough is highly hydrated. Moderate spreading is expected, but dough that immediately flattens into a thin puddle may lack strength or be overfermented. If the rounds retain a gently domed shape and develop a light skin across the surface, they should be ready for final shaping after the resting period.
Shaping a High-Hydration Sourdough Batard
At approximately 6:45 p.m., lightly flour the top of each dough round and carefully turn it over so the floured surface faces downward. Fold the bottom toward the middle, followed by the left and right sides. Stretch the upper portion away from the center before folding it downward. These movements begin organizing the dough into an elongated batard.
Small sections from the upper sides can then be stretched toward the center and crossed over one another in a lacing motion. Continue working toward the bottom of the dough. Roll the shaped dough from the bottom toward the top and gently seal the seam. The finished loaf should have visible surface tension without being squeezed hard enough to remove the accumulated gas.
Work efficiently and use the bench knife whenever the dough sticks. Excessive bench flour may prevent the layers from sealing during shaping, so use only what is necessary. Proper tension helps the wet dough retain its form during proofing and baking. The same dough can also be formed into round boules when round proofing baskets or baking vessels are preferred.
Overnight Cold Proof
Place each shaped loaf seam-side up in a lightly floured banneton or proofing basket. The baskets should provide enough support and expansion space for the wet dough. Cover them to prevent the surface from drying, and transfer them to the refrigerator at approximately 7:25 p.m. Refrigerate the loaves for around 13½ hours.
The long cold proof slows fermentation while allowing the bread to develop deeper sourdough flavor. Cold dough is also firmer and easier to turn out, score, and transfer into a hot Dutch oven. The loaves can be baked directly from the refrigerator the next morning. There is no need to let them return to room temperature beforehand.
Baking Sourdough Bread in a Dutch Oven
At approximately 8:00 a.m., preheat the oven to 450°F, or 230°C. Place the Dutch oven or combo cooker inside while the oven heats. Give the baking vessel a full hour to become thoroughly hot. Strong initial heat supports oven spring and helps the cold dough expand rapidly before its crust becomes firm.
At 9:00 a.m., remove one loaf from the refrigerator and carefully turn it out of its basket. Score the surface with one long slash using a sharp bread lame or razor. Scoring provides a controlled opening where the loaf can expand. A confident, clean cut is more effective than repeatedly dragging the blade across the wet dough.
Transfer the loaf to the preheated Dutch oven, cover it, and bake for 20 minutes. The enclosed vessel traps moisture released by the dough, creating steam that keeps the crust flexible during oven spring. Remove the lid after 20 minutes and bake uncovered for another 30 minutes, or until the crust reaches the desired deep brown color.
A fully baked loaf should reach an internal temperature of approximately 208°F, or 97°C. A darker crust provides a deeper, more developed flavor, while a lighter bake creates a milder crust. Repeat the process with the second loaf. If both loaves fit safely in separate baking vessels, they may be baked together when the oven heats evenly.
Cooling and Storing Sourdough Bread
Transfer the baked loaves to a wire rack and cool them for one to two hours before slicing. The interior continues setting after the bread leaves the oven. Cutting too early releases steam and may compress the delicate crumb, leaving it damp or gummy. Complete cooling produces cleaner slices and reveals the bread’s open, lacy interior.
Once cool, store the bread in a suitable bread bag or container at room temperature. For longer storage, cut the loaf into slices and freeze them. Individual frozen slices can be reheated or toasted as needed. This method preserves the bread more effectively than refrigerating it, which may cause the crumb to become stale more quickly.
Notes for Successful High-Hydration Sourdough
Keep the dough near 78°F during bulk fermentation, add the reserved water slowly, and avoid adding extra flour simply because the dough feels sticky. Use wet hands and a bench knife for easier handling. Pay attention to bubbles, elasticity, volume, and movement rather than relying entirely on the suggested times, since every starter and kitchen environment behaves differently.
Allow the stretch-and-fold schedule to develop strength gradually, then handle the aerated dough gently during dividing and shaping. Use properly sized proofing baskets to support the soft loaves during their overnight rest. Finally, preheat the Dutch oven thoroughly, bake the dough directly from the refrigerator, and let the finished loaves cool completely before cutting them.
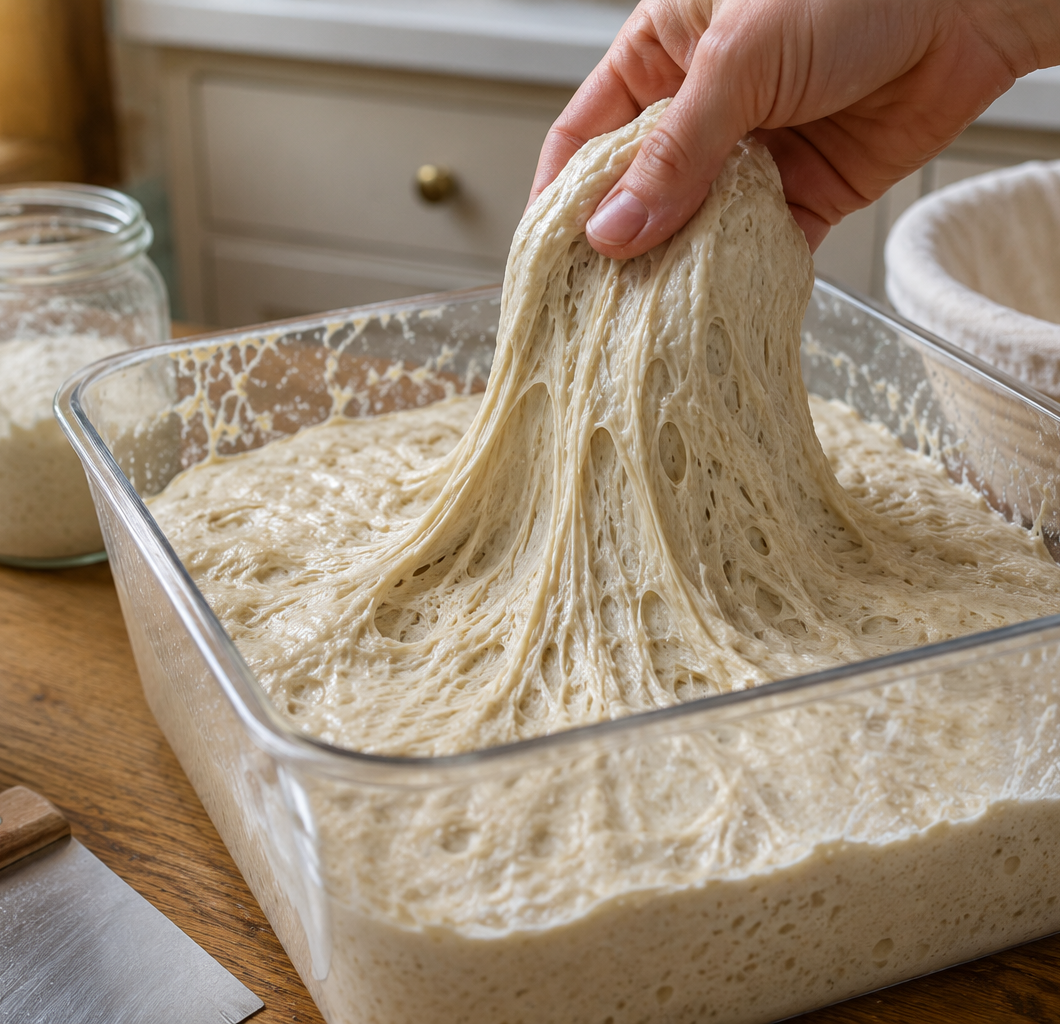
High-Hydration Sourdough Bread
High-hydration sourdough bread is known for its thin, crisp crust and light, open crumb filled with irregular holes.
2
servings7
hours45
minutes50
minutes225
kcal815
minutes60
minutes23
hours10
minutesIngredients
- Levain
30g medium-protein bread flour
30g whole wheat flour
60g water
30g ripe sourdough starter
- Main Dough
822g medium-protein bread flour
64g whole wheat flour
745g water, divided
151g ripe levain
17g salt
Directions
- Prepare the Levain
Mix all levain ingredients.
Cover and ferment at 77–80°F for 5 hours. - Prepare the Autolyse
Mix both flours with 650g water.
Cover and rest for 2 hours. - Mix the Dough
Add the levain and salt.
Gradually mix in the remaining 95g water.
Fold for 2–3 minutes.
Transfer to a fermentation container. - Bulk Ferment
Ferment at 78°F for about 4 hours.
Complete 3 fold sets at 15-minute intervals.
Complete 3 more at 30-minute intervals.
Stop when the dough looks smooth, bubbly, and jiggly. - Divide and Preshape
Turn the dough onto a lightly floured surface.
Divide it into two equal portions.
Preshape into rounds.
Rest uncovered for 30 minutes. - Shape
Shape each portion into a boule or batard.
Place seam-side up in floured proofing baskets. - Cold Proof
Cover the baskets.
Refrigerate for approximately 13½ hours. - Bake
Preheat the oven and Dutch oven to 450°F.
Turn out and score one cold loaf.
Bake covered for 20 minutes.
Bake uncovered for 30 minutes.
Repeat with the second loaf. - Cool
Transfer the loaves to a wire rack.
Cool for 1–2 hours before slicing.
Nutrition Facts
2 servings per container
- Amount Per ServingCalories225
- % Daily Value *
- Total Fat
1g
2%
- Total Carbohydrate
46g
17%
- Protein 7g 15%
* The % Daily Value tells you how much a nutrient in a serving of food contributes to a daily diet. 2,000 calories a day is used for general nutrition advice.